
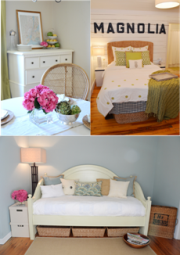
{Wood Accent Wall}
After being inspired by other reclaimed wood accent walls, we decided to include one in our bedroom. We did plenty of online research looking for reclaimed wood, only to realize A) we couldn't find exactly what we wanted or B) it was way out of our price range. We then decied to distress new wood and make our own faux "reclaimed" wood. Here's how we started:

On the ride over to Lowes, Brian had the idea for us to use fencing ~ it's more coarse and tends to be cheaper than finished pine. We decided on 8' and 6' pieces and at $1.34-$2.50 a piece we felt they were affordable. But to make this a real bargain, we asked an employee if he would give us a discount on defected boards {spit, warped or cracked}. They said yes and ended up selling them to us for 25 and 50 cents a piece!!!
Our total came out to just under $10!!


Inspired by driftwood ~ we brushed each piece with a grey stain, then white washed over each one. I used a different white wash ratio with each board to make each slightly unique ~ working the brush against the grain. After they were dry, I distressed additional boards using a chain and hammer.


Brian went to work cutting each board and installing them.


Once our accent wall was complete, Brian installed our trim. He used the same molding as our guest bedroom shown here.


Check back soon to see Part IV!


This looks really cool. I can't wait to see how you decorate the room now that it's got such a beautiful wall.
ReplyDeleteI also love it a lot I'm wanting to do our wall at head of bed in spare bedroom and use silver rusty like roofing metal for a head board I can't wait to get started on that room all the other walls are a light grey so it will all go nicely together , just need to decide on quilt I'm wanting to GI with n what color curtains
DeleteYes what stain and white washes did you use please we will probably be doing it this weekend , and did you just drill it too your wall cause I can't understand how to boards would nail to it if there's not a header board or something in every part you put screw in can you please tell me thank you cause its more than likely gonna be me doing this room while he supervises as usual he's a bit bossy lmbo
DeleteYes what stain and white washes did you use please we will probably be doing it this weekend , and did you just drill it too your wall cause I can't understand how to boards would nail to it if there's not a header board or something in every part you put screw in can you please tell me thank you cause its more than likely gonna be me doing this room while he supervises as usual he's a bit bossy lmbo
DeleteI also love it a lot I'm wanting to do our wall at head of bed in spare bedroom and use silver rusty like roofing metal for a head board I can't wait to get started on that room all the other walls are a light grey so it will all go nicely together , just need to decide on quilt I'm wanting to GI with n what color curtains
DeleteThis is looking absolutely incredible!!! Can't wait to see more updates!
ReplyDeletexoxo,
Carly
How did you install these? Tongue and groove boards? Were these just nailed in, and nail is shown?
ReplyDeleteHi ~ We went super low maintenance on this project ~ these were scrap fencing boards, no tongue and groove. We puzzled them together ourselves and left galvanized nail heads exposed. We'll be sure to include more detailed photos once we get the room finished. Thanks so much for reading!
ReplyDeleteHi, love this room. Hope you don't mind that I linked it up as inspiration for my bedroom that needs a little something.
ReplyDeleteYou're going to have so many hits on this, so yes, please post as many details as possible! We want to do the same thing in our bedroom and I love the idea of it being new and clean instead of wondering where the palettes have been. And can't wait to try and snag a deal like you did–you just lifted my home-improver spirits after a tough day!
ReplyDeleteCould you share the stains/whitewash you used?
ReplyDeleteLove the look..I have been wanting to do something like this with fencing and suggested it to my husband (a contractor) and he told me you should not use treated lumber in the house. Was any of the wood you used treated? I don't know if he knows what he's talking about or is just trying to discourage me because he doesn't want another project! LOL
ReplyDeleteI did not see an answer to this. I would also like to know if it was treated fencing.
DeleteIt is beautiful and I'm wanting to do this in our small bathroom
What color of white wash stain and paint did you use thank you
ReplyDeletethis would boom to more than 75,000 by 1945 and the end of the War. The largest facility built in Oak Ridge, the K-25 Uranium separation facility covered more than 44 acres. For a number of years, this was the largest building in the world. Aside from K-25, S-50 and Y-12 plants were built to separate the fissile isotope uranium-235 from its natural state. The United States also built the X-10 plant which is currently the Oak Ridge National Laboratory, was originally established as a pilot project for the production of plutonium for a Graphite Reactor.
ReplyDeletevinyl fence pricing
Hi, I bought fenceboards to do a plank wall and they were super wet when we purchased them! I’m currently staining them but am wondering how long I should let them dry for in the garage before I bring them inside. Did you let your wood acclimate to your indoor climate first? I’m worried they’ll shrink and have gaps on the wall. Was your wood wet or dry when you purchased and have you experienced any shrinking? Thanks!
ReplyDelete